Construction has finished on the Wirbelwind. Changes to the turret were limited to removing the basic and clunky flash eliminators from the ends of the barrels and replacing them with ends from the Tristar 20mm Flak accessory kit barrels. The rest of the turret and flakvierling assembly are pretty good, and up to crisp modern Tamiya standards.
First up is a base coat of 50/50 Tamiya acrylic black and hull red:
Next is a well diluted mix of Tamiya Desert Yellow and Dark Yellow, again, around 50/50 with a splash of white to lighten it. The top half of the turret is not attached at this point as I have a lot of detail painting to do in the turret before I can button it up:
About Me

- Dave's Tank Workshop
- I'm a UK based modeller, specialising in German and Commonwealth armour. I have worked on a commission basis for enthusiasts all over the world, created masters for one of the big 1/32 resin "ready made" model companies, and have recently helped out on some projects for Archer Fine Transfers and other 1/35 armour accessory companies. I build for myself - when I have time! - concentrating on Stugs, Pz IV's and UK and Commonwealth WW2 stuff. I also post my work on www.track-link.com, www.missing-lynx.com and www.warwheels.net. Please leave comments or questions on the blog or on any of the websites I post on. If you would like to contact me, just click on "view my complete profile" below for my email address. All the best, and thanks for visiting! Dave
Showing posts with label Wirbelwind. Show all posts
Showing posts with label Wirbelwind. Show all posts
Tuesday, 19 March 2013
Sunday, 17 March 2013
Flakpanzer IV Wirbelwind
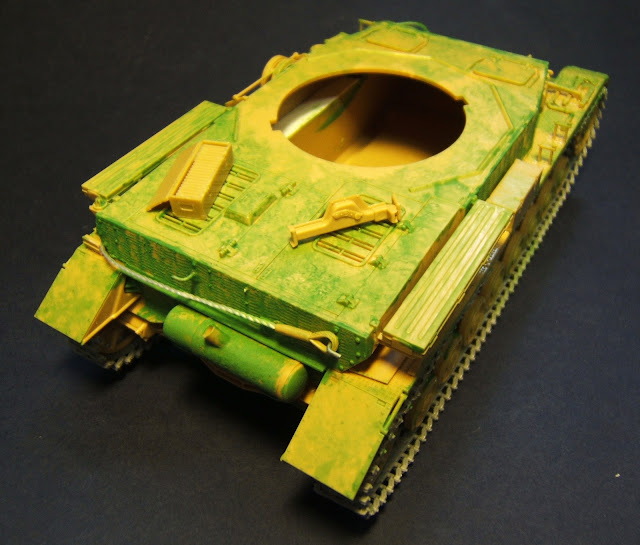
I thought I'd post some progress pictures of my latest project. It's the Tamiya Wirbelwind with a few tweaks and improvements. I've added zimmerit as the chassis is from a Pz IV Ausf H. I've also replaced the "rubber band" tracks with indy-links from Dragon. Tools have had etched brass clamps added, and I've placed a 100 round 2cm ammo box from Tristar's 2cm Flak accessory set on the right hand side. I'll be using quite a few bits from this set as the project progresses - especially the spare 2cm barrels to replace the Tamiya ones.
It will be finished as a vehicle of the 1st SS Panzer Division during the Ardennes offensive, so I'll be adding a few crew figures dressed suitably warm...
The green finish to the surface? I always stipple on a dilute mix of liquid poly and squadron green putty to add a slight texture to the surface of the armour/steel plate. Otherwise the surface would be too smooth, too uniform, too unrealistic.
The green finish to the surface? I always stipple on a dilute mix of liquid poly and squadron green putty to add a slight texture to the surface of the armour/steel plate. Otherwise the surface would be too smooth, too uniform, too unrealistic.
Subscribe to:
Posts (Atom)


